So you have been building a custom module. Congradulations! This is a big step, but now you want more. You would like to be able to have a configuration page so that you can set some settings particular to your module. This tutorial will give you the very basics to get you a configuration page for your custom module.
Here are the building block you will need and some assumptions of what you will start off with.
- Building blocks
- Basic custom module
- CustomModuleForm.php
- custom_module.routing.yml
- custom_module.schema.yml
- Assumptions
- You already have at least a basic Drupal site up and running
- You have access to the files that make up the site
- You can edit these files with a text editor
- You have at least a basic custom module already set up
You can get all the completed code on the Custom Module Configuration repository on gitub.
Building blocks
Basic Custom Module
If you don’t have a module already please create one first before going through these instructions. It will make a lot more sense about what actually is needed to add a configuration page. Visit the Drupal 9 Basic Custom Module page on this site for building you own custom module.
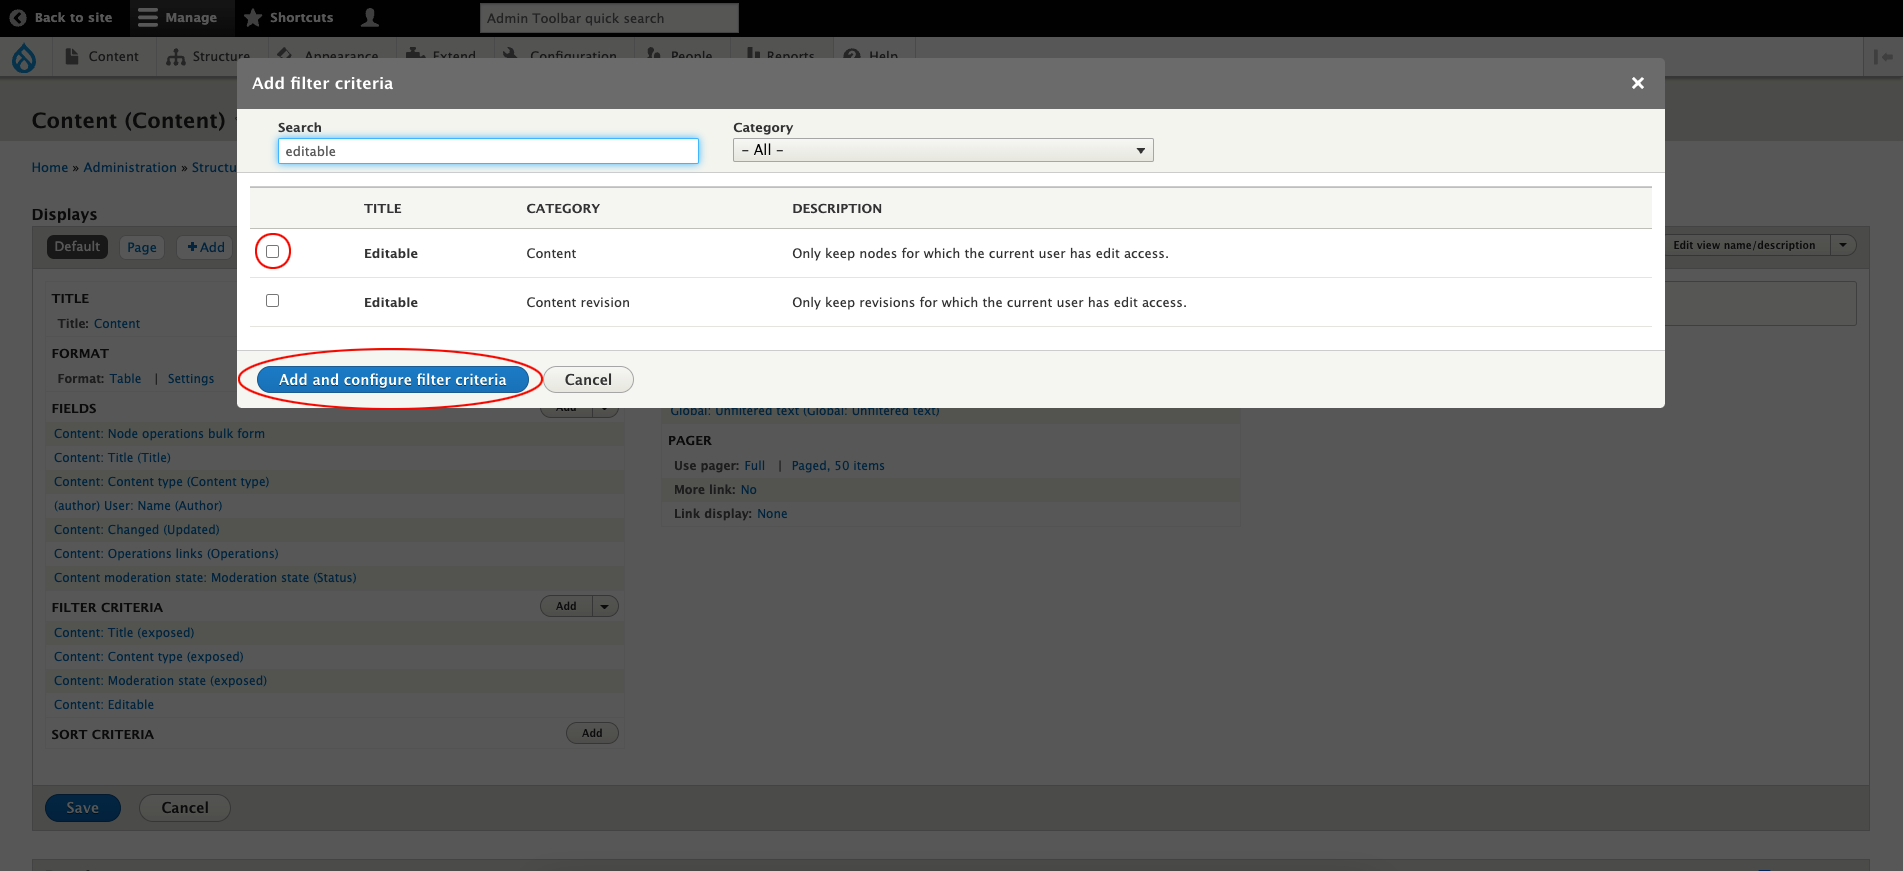
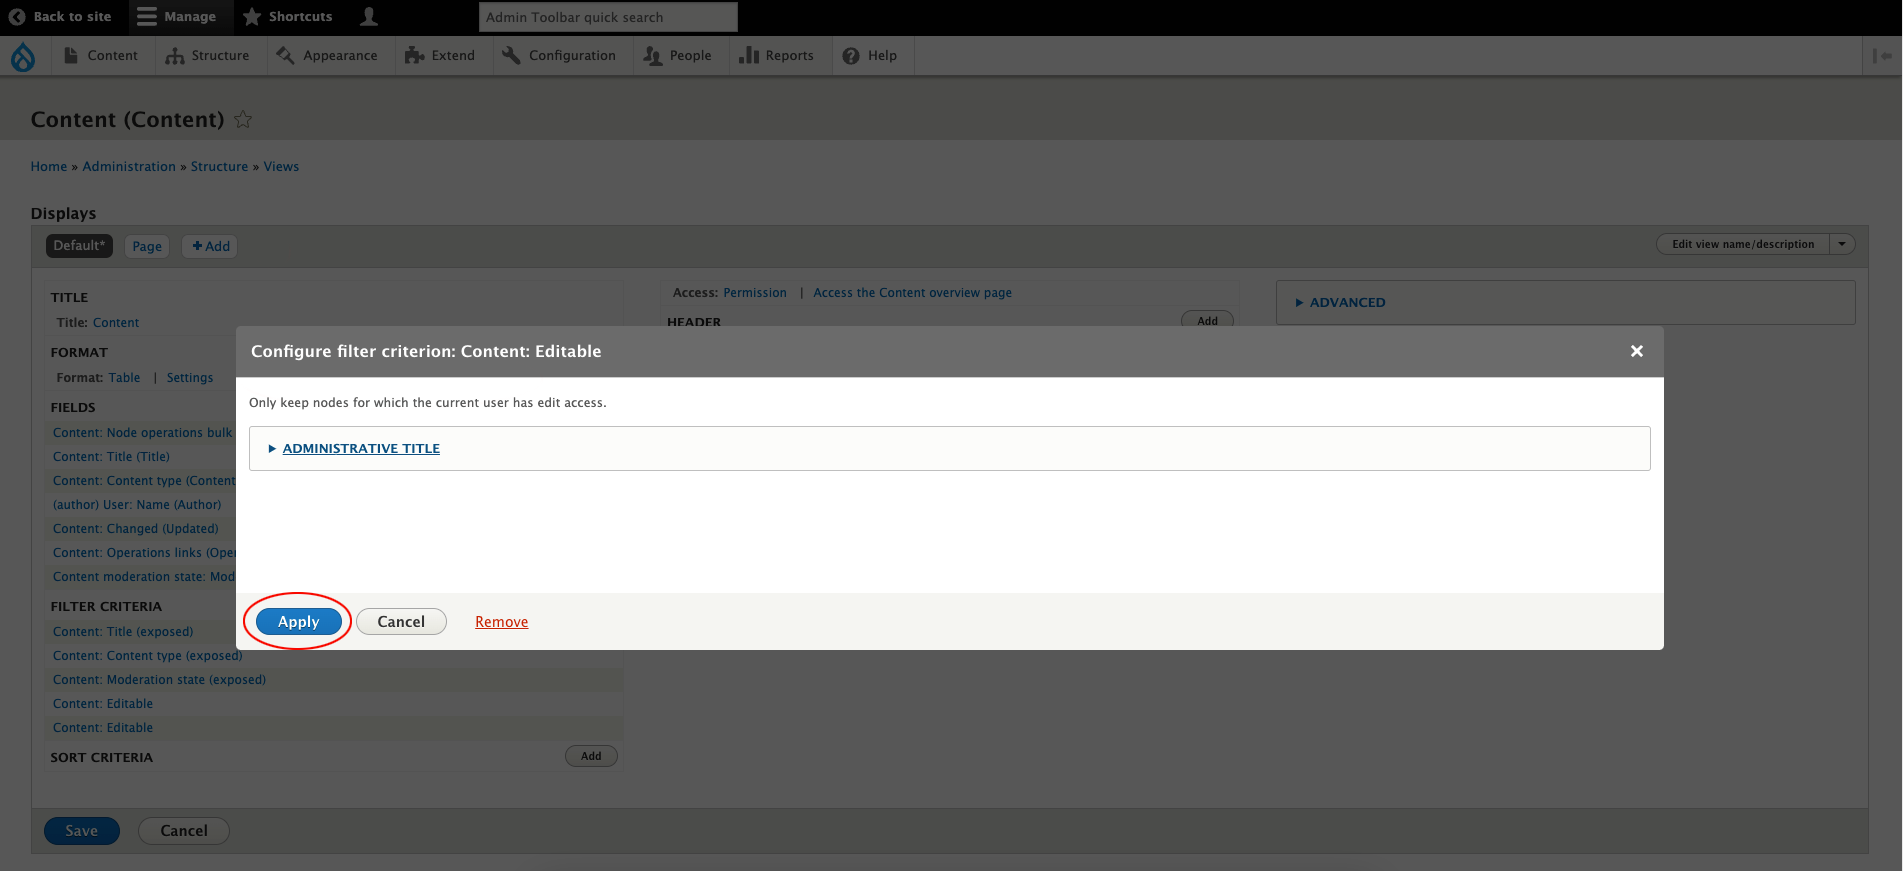
CustomModuleForm.php
For you to save a configuration you need some way to gather the information. The CustomModuleForm.php is a very important piece to the puzzle. This file will be stored in a subdirectory of your custom module (e.g., /docroot/sites/default/modules/custom/custom_module/src/Form/CustomModuleForm.php). This file is used to build the form that you will use to enter your desired configuration.
You need the following parts to this file in order for your form to work:
- Form class
- Methods of the class
- getEditableConfigNames() – gets the configuration name
- getFormId() – returns the form’s unique ID
- buildForm() – returns the form array
- validateForm() – validates the form
- submitForm() – processes the form submission
Form class
The form class is the basis of the form. There is some configuration before the class to get everything needed to get the form available in the right space. All the methods in this section will be within this class. Here is a complete file.
<?php

/**
 * @file
 * Contains Drupal\custom_module\Form\CustomModuleForm.
 */

namespace Drupal\custom_module\Form;

use Drupal\Core\Form\ConfigFormBase;
use Drupal\Core\Form\FormStateInterface;

class CustomModuleForm extends ConfigFormBase {
	// Methods below and code go in this class
}
getEditableConfigNames()
  /**
   * {@inheritdoc}
   */
  protected function getEditableConfigNames() {
    return [
      'custom_module.settings',
    ];
  }
getFormId()
  /**
   * {@inheritdoc}
   */
  public function getFormId() {
    return 'custom_module_form';
  }
validateForm()
This function has to be here but currently it is not validating anything for simplicity.
  /**
   * {@inheritdoc}
   */
  public function validateForm(array &$form, FormStateInterface $form_state) {

  }
submitForm()
  /**
   * {@inheritdoc}
   */
  public function submitForm(array &$form, FormStateInterface $form_state) {
    $config = $this->config('custom_module.settings');
    $config->set('custom_module.custom_module_settings', $form_state->getValue('custom_module_settings'));
    $config->save();
    return parent::submitForm($form, $form_state);
  }
custom_module.schema.yml
Let drupal know where to save the configuration in the database with the schema file located at /docroot/sites/default/modules/custom/custom_module/config/schema/custom_module.schema.yml.
custom_module.settings:
  type: config_object
  label: 'Custom module settings'
  mapping:
    policy_library:
      type: mapping
      mapping:
        custom_module_settings:
          type: text
          label: 'Custom module settings'
custom_module.routing.yml
The routing.yml file is stored in the root directory of your custom module file structure at /docroot/sites/default/modules/custom/custom_module/. Like most of the other files in this folder it starts off with the custom module name. In this case it is custom_module. So the full file path is /docroot/sites/default/modules/custom/custom_module/custom_module.routing.yml.
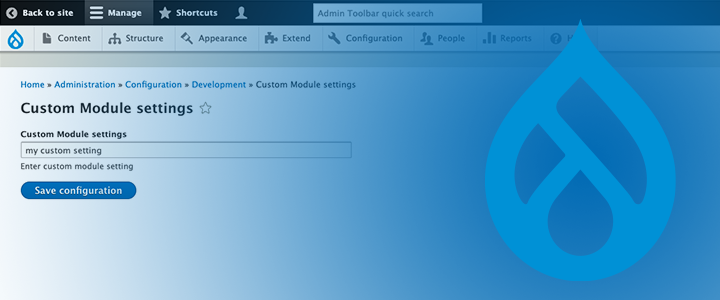
The custom_module.routing.yml file, in this case, is going to tell Drupal that there is a page at /admin/config/development/custom-module. That page will have a form, title, and a required permission to access it.
custom_module.form:
  path: '/admin/config/development/custom-module'
  defaults:
    _form: '\Drupal\custom_module\Form\CustomModuleForm'
    _title: 'Custom Module settings'
  requirements:
    _permission: 'administer site configuration'
custom_module.links.menu.yml
The full path of the links.menu.yml file is /docroot/sites/default/modules/custom/custom_module/custom_module.links.menu.yml. This file lets Drupal know that there should be a menu item under the Home > Administration > Configuration > Development menu structure with these settings.
custom_module.form:
  title: 'Custom module settings'
  description: 'Configure settings for the custom module.'
  route_name: custom_module.form
  parent: 'system.admin_config_development'